Connect Azure subscription
To link your existing Azure subscription with oneclick™, a so-called “Service Principal” is required. It acts as a “key” that allows oneclick™ to access the resources created in Azure. You will enter the generated values later in the oneclick™ Admin.
Before you can create a Service Principal, certain roles and permissions must be in place. In new Azure subscriptions, the automatically created user often does not have sufficient permissions, which can prevent specific Azure CLI commands from being executed and roles from being assigned.
1. Check Permissions
If you already have the required rights on the subscription and at least the Contributor role within a resource group, proceed directly to step 3: Retrieve data from the Azure subscription
To assign roles in Azure, you must have the appropriate rights on the subscription.
To assign roles such as Contributor or Owner, at least one of the following permissions is required:
- Owner of the subscription
- User Access Administrator Details can be found in the official Microsoft documentation under User Access Administrator
If these rights are missing, the “Assign role” button in the IAM menu may appear disabled.
2. Assign a Role in the Azure Portal
- Sign in to the Azure Portal with your user account.
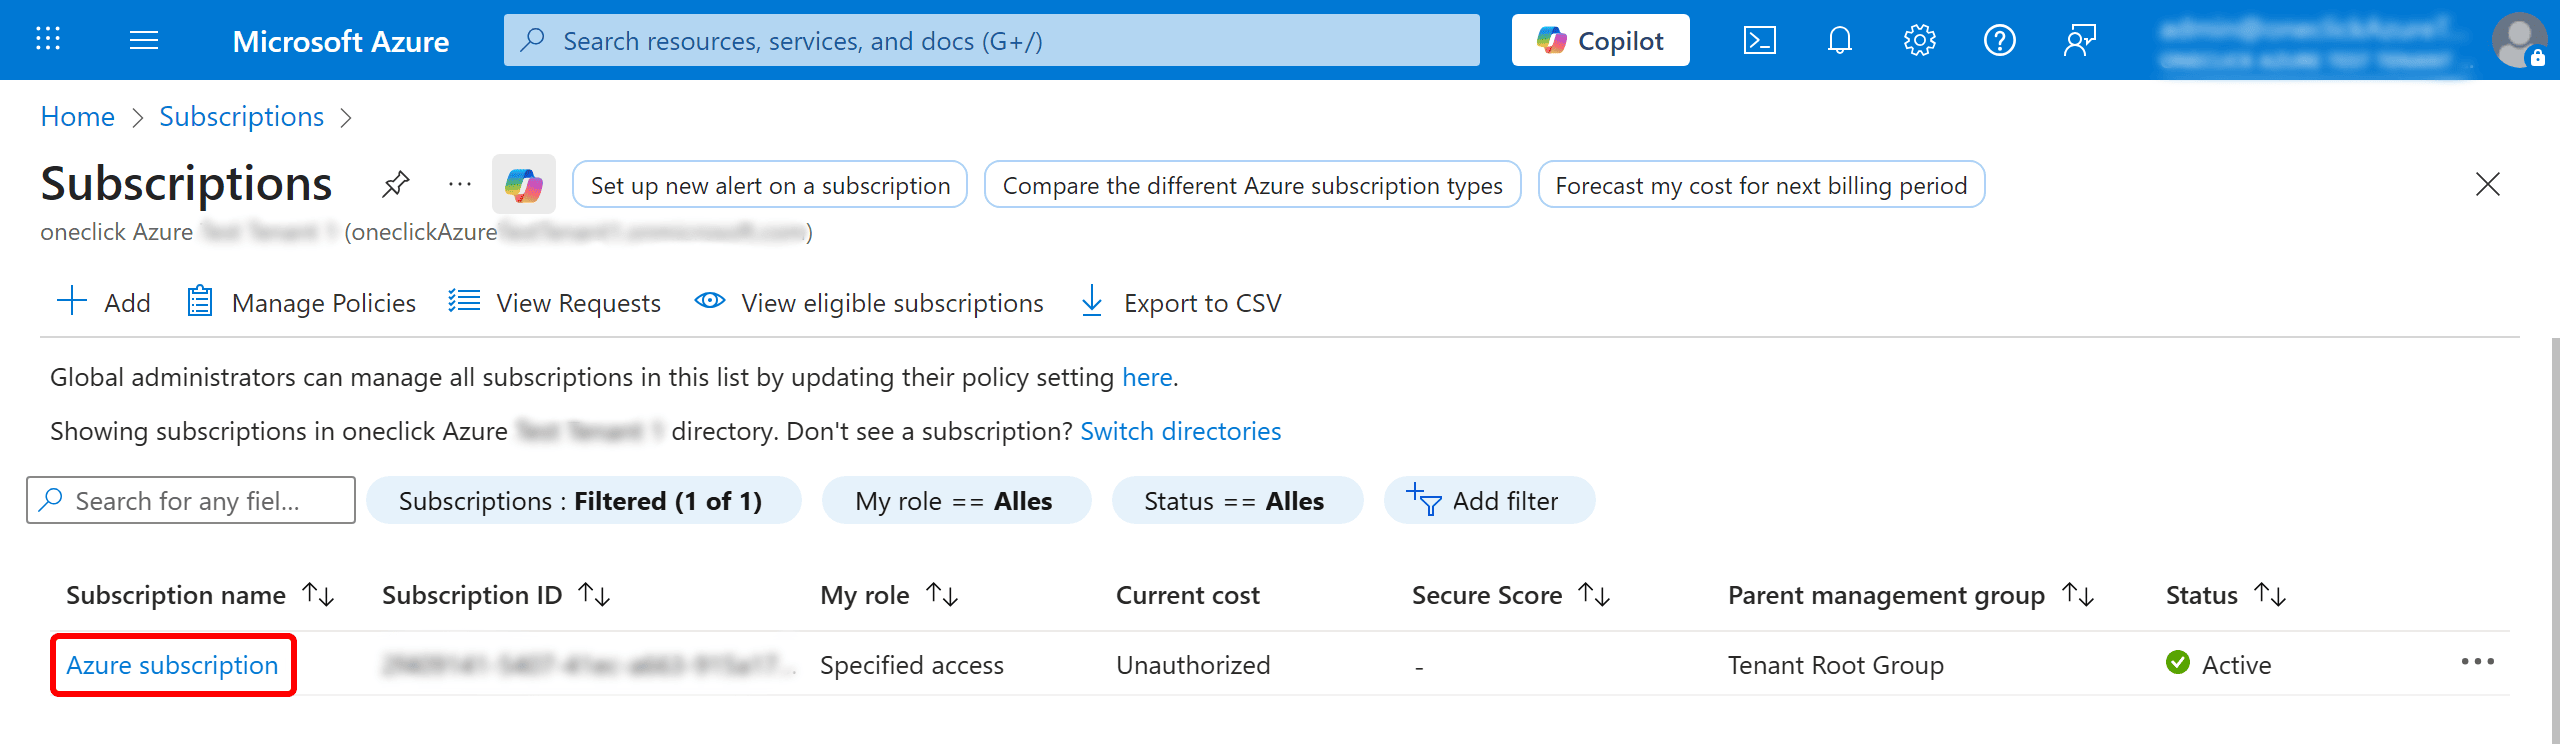
- Open the “Subscriptions” service in the Azure Portal.
You can find it via the search bar at the top or via the Subscriptions tile on the start page. You can find it via the search bar at the top or via the Subscriptions tile on the start page.

- Select your subscription to open the details page.
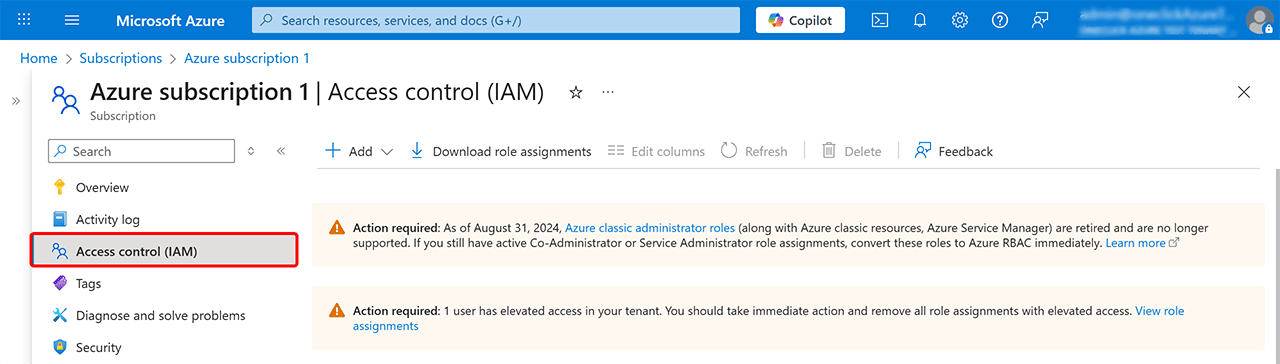
- Click on Access Control (IAM) in the left-hand menu.
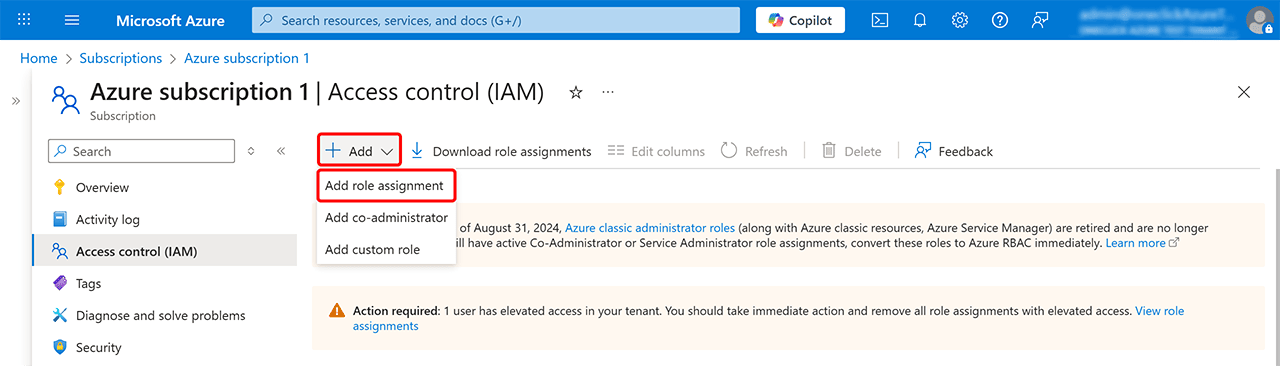
- Select + Add → Add role assignment.
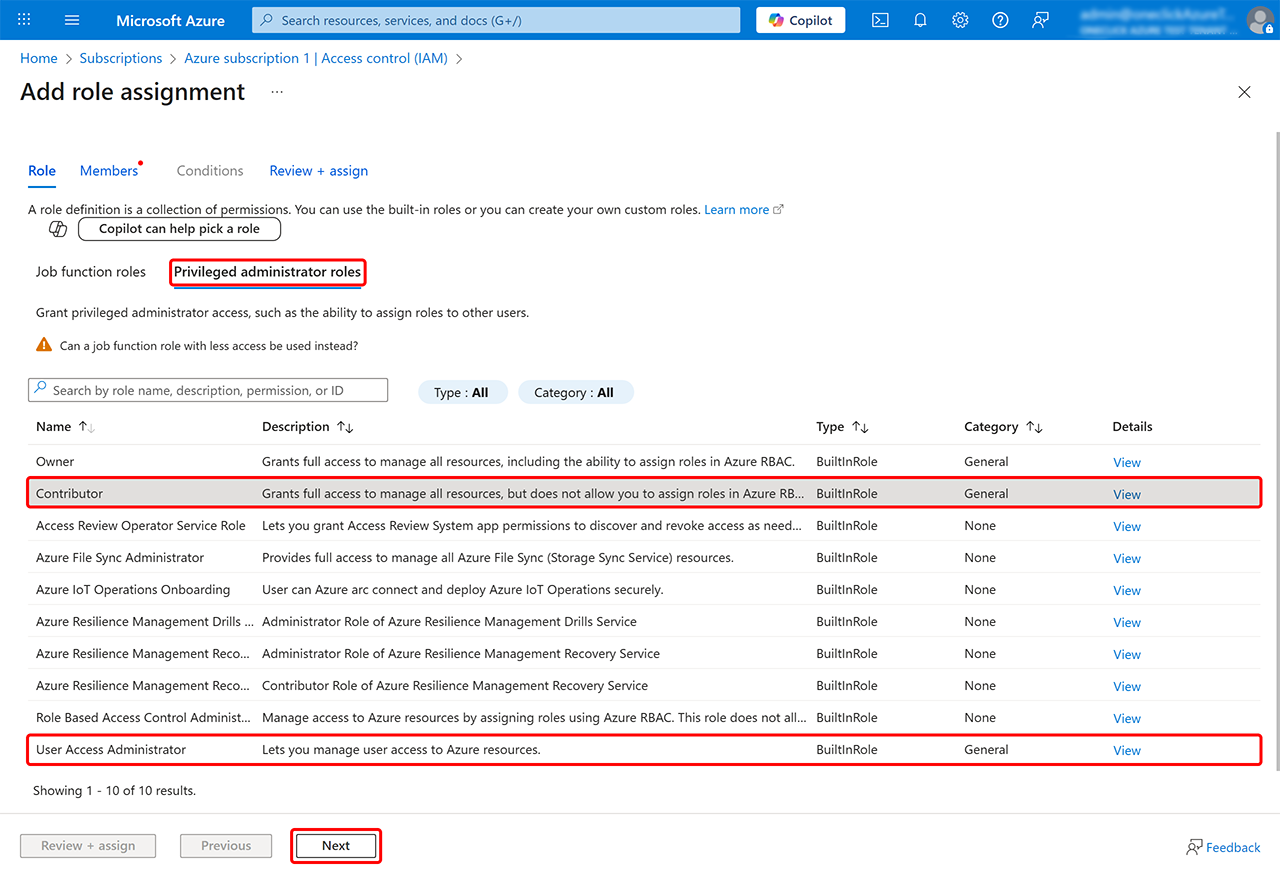
- Open the Privileged administrator roles tab. In the Role field, select one of the following options:
- Contributor + User Access Administrator – minimum required to create and manage resources.
- Owner – includes all Contributor rights and additionally allows managing other users’ permissions.
- Click Next.
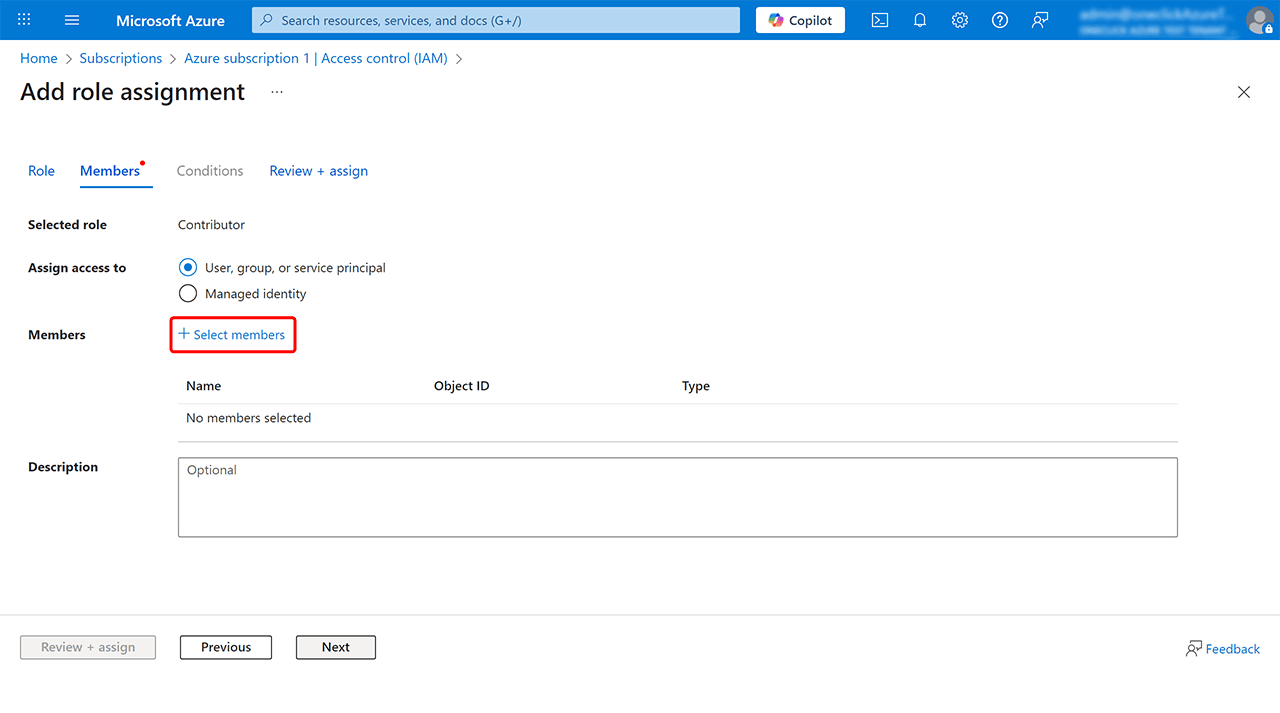
- In the Members tab, click + Select members.
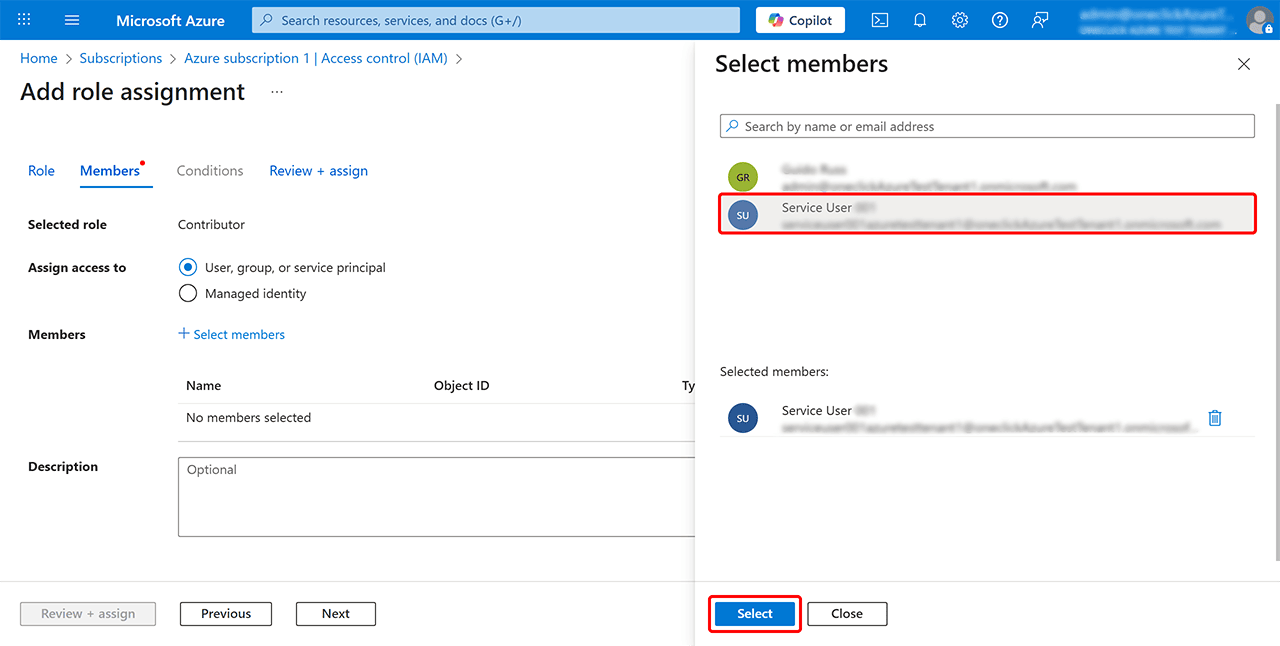
- Select your user account on the right side and confirm by clicking Select.
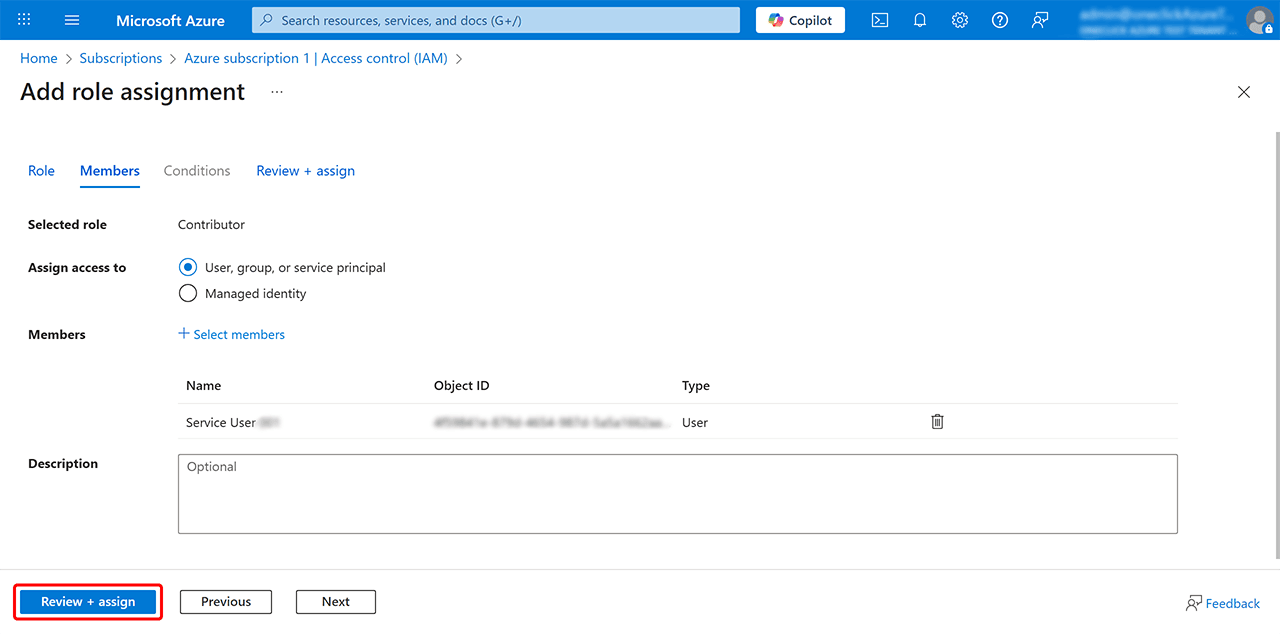
- Click Review + Assign to apply the changes.
Only with these permissions can you provision resources using the oneclick™ integration.
3. Retrieve Data from the Azure Subscription
- Sign in to the Azure Portal with the account associated with your subscription.
- Click on
 (top right) to open the Azure CLI (Cloud Shell).
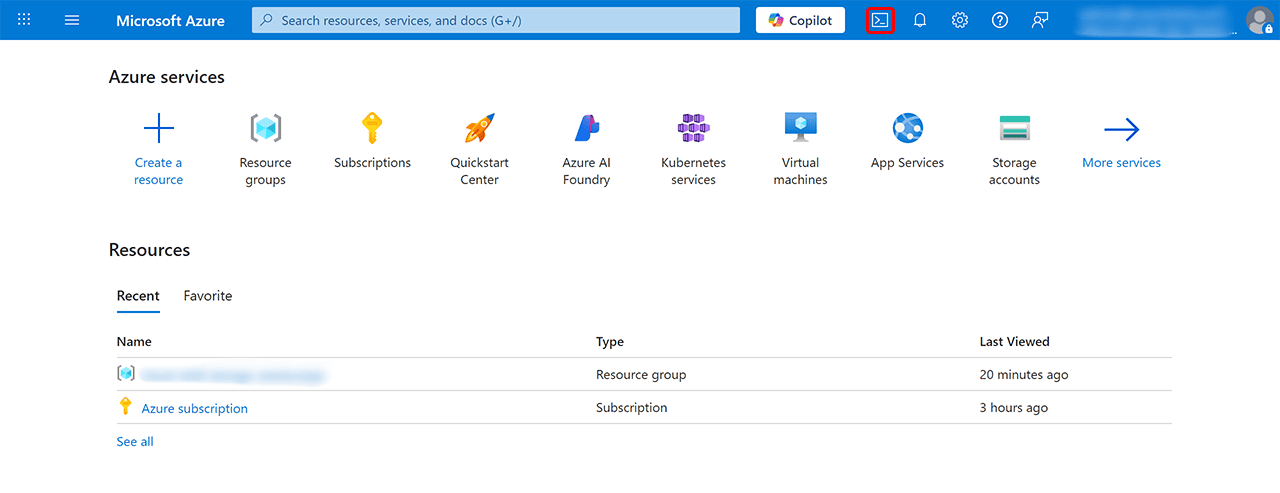
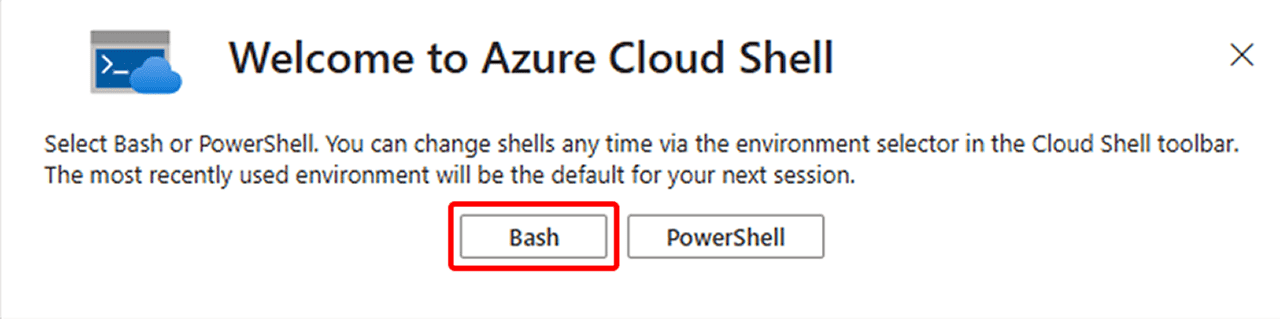
- If you are opening Azure Cloud Shell (Azure CLI) for the first time, select Bash as the shell type.
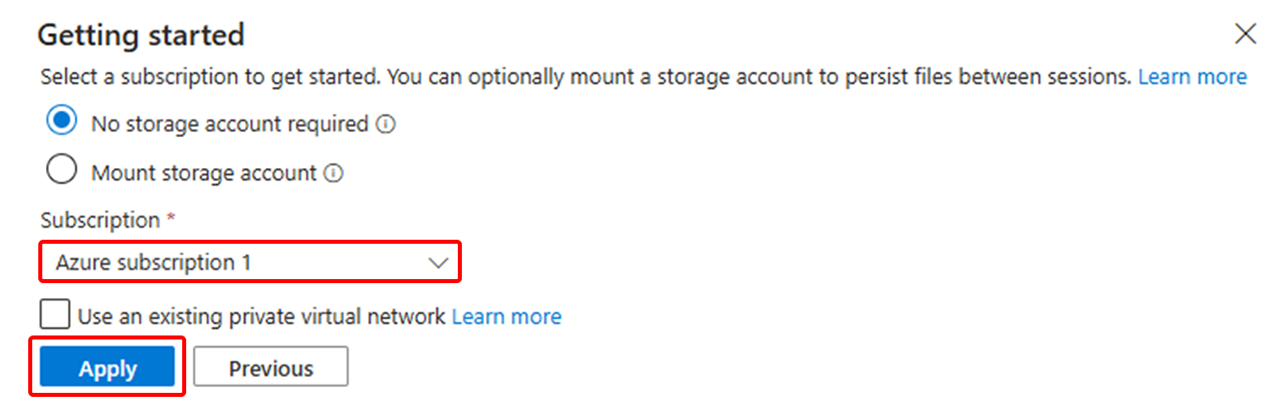
- Please choose in the next step whether you want to create/use persistent storage. Both options work.
If you complete all subsequent steps in a single session, persistent storage is not required.
- Once the Azure Cloud Shell environment is ready, you can run the following commands.
4. Register Azure Resource Providers
Before linking oneclick™ with your Azure subscription, certain resource providers must be registered. These ensure that services such as Storage and Virtual Machines (VMs) can be used properly.
- Open the Azure CLI via (top right).
- Run the following command:
az provider register --n microsoft.classicstorage && az provider register -n microsoft.storage && az provider register -n microsoft.storageactions && az provider register -n microsoft.storagetasks && az provider register -n microsoft.compute && az provider register -n microsoft.computeschedule && az provider register -n microsoft.hybridcompute && az provider register -n microsoft.network
This ensures that all required services such as storage, networking, and virtual machines are registered.
5. Retrieve Subscription ID
- Run the following command in the Azure CLI (Bash):
az account show --query id --output tsv
- The output should look similar to:
5XXXXXX1-XX1c-4XX4-XXXX-b2axxxxxx9
- Copy this subscription ID for later steps
6. Create Service Principal
Create the Service Principal with the appropriate permissions by running the following command. Replace the subscription ID with your own value (see step 5).
- Run the following command:
az ad sp create-for-rbac -n oneclick_sp --role Contributor --scopes /subscriptions/5XXXXXX1-XX1c-4XX4-XXXX-b2axxxxxx9
- After the Service Principal has been successfully created, you will receive an output similar to the following:
Creating 'Contributor' role assignment under scope '/subscriptions/5XXXXXX1-XX1c-4XX4-XXXX-b2axxxxxx9'
{
"appId": "09XxXxXxx-eXX3-4XX4-9XX8-XxXxXxx45aa",
"displayName": "oneclick_sp",
"password": "pXXXX~txx-XPcXxXxXxxPEEXxXxXxxs2wXxXxXxxM",
"tenant": "b00xxxx-xxxx-4a31-axx0-f6xxx4xx1xxxe"
}
- Record this output for later use in step 7.5, starting from the line containing the subscription ID.
7. Enter Data into the oneclick™ Admin
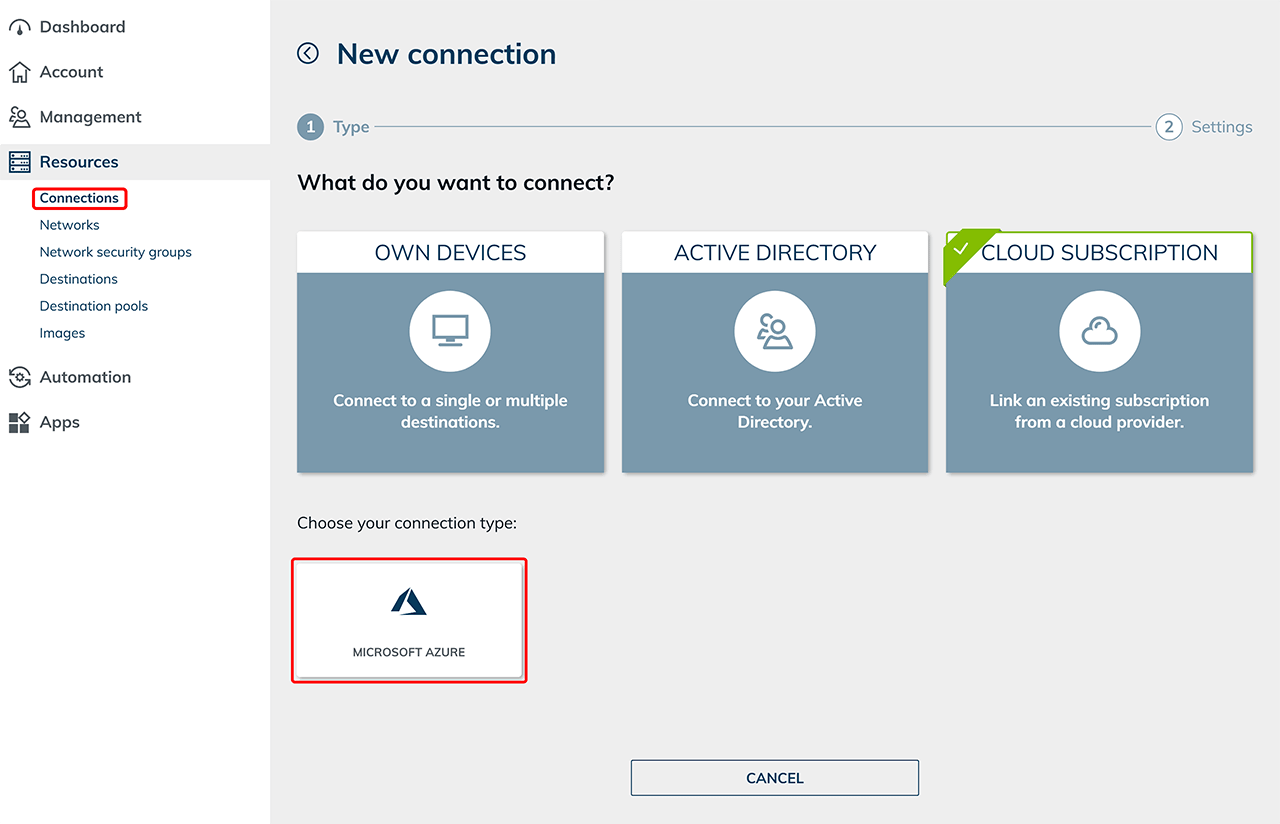
- In the oneclick™ Admin, navigate to the Resources tab and click Connections.
- Click the + Symbol to link your cloud subscription.
- Select the Cloud Subscription tile and choose the connection type “Microsoft Azure”.
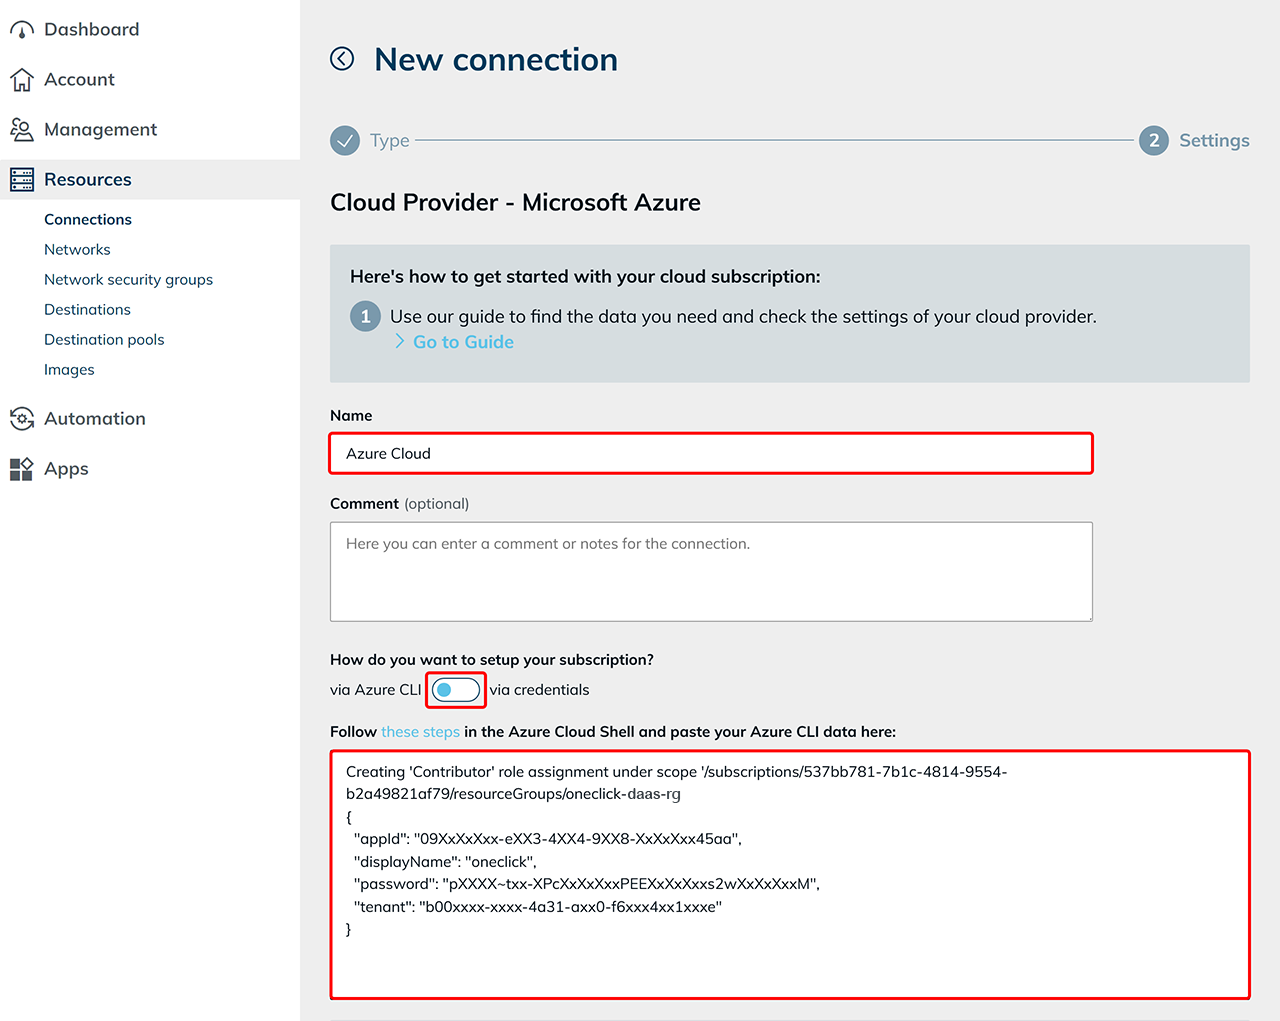
- Assign any Name to the connection.
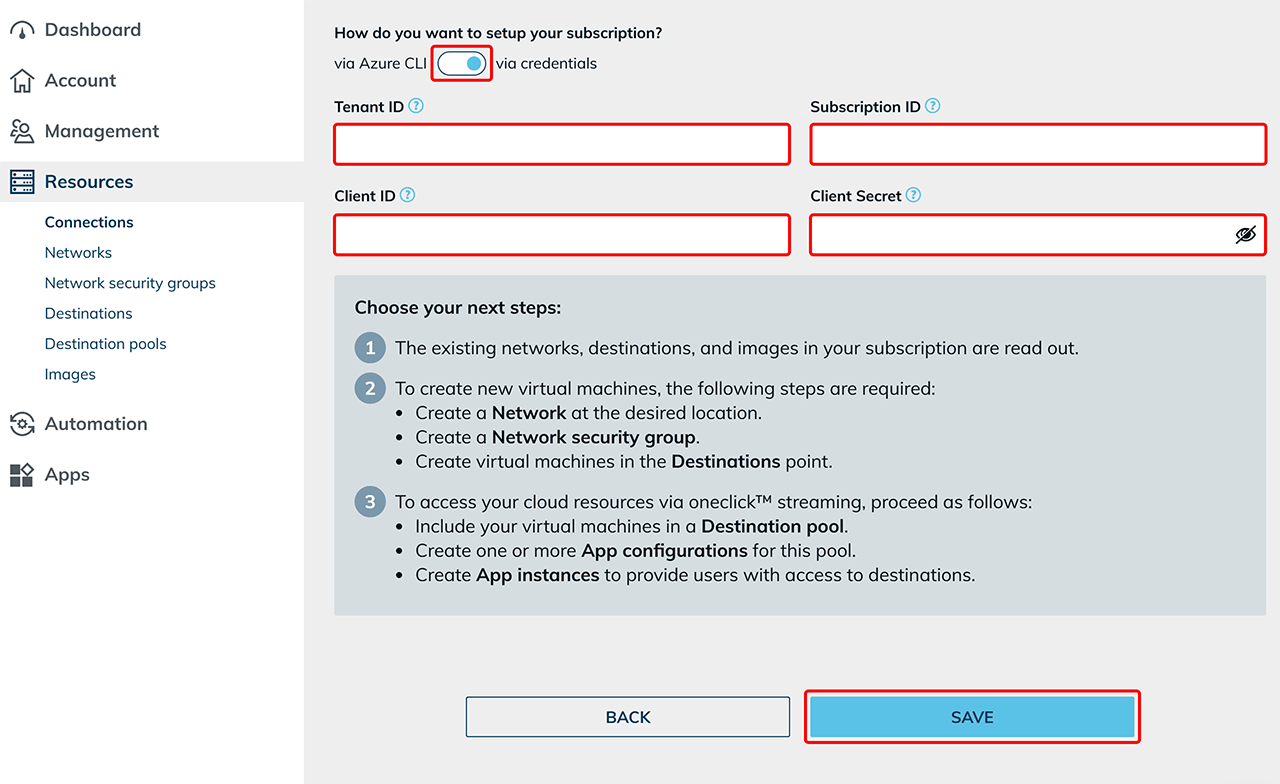
- If you choose “via Azure CLI”, copy the entire output you received in step 6.2 and paste it into the text field.
- If you choose “via credentials”, copy the values from step 6.2 into the respective fields:
- Tenant ID: use the value from “tenant”.
- Subscription ID: use the value following “/subscriptions/”.
- Client ID: use the value from “appId”.
- Client Secret: use the value from “password”.
- Click Save.
If successful, your Azure subscription will now be linked and existing resources will be loaded for the first time.
 Costs arise only when using Azure services such as virtual machines or storage.
If you want to use multiple Azure subscriptions with oneclick™, repeat the above steps for each subscription. Create a separate connection for every Azure subscription.
Support Notice
We do not assume any liability for the implementation of the described steps. If anything is unclear or if technical deviations occur, we recommend contacting the cloud provider’s support team directly.
Contact Information
Microsoft Deutschland GmbH
Walter-Gropius-Straße 5
80807 Munich
Germany
General Customer Service:
0180 66 72 255
(Monday–Friday 08:00–18:00, Saturday 09:00–17:00)